최신 문서를 참고하세요
최신 버전의 문서는 화면 이동하기에서 확인할 수 있어요.
화면 이동하기
Bedrock 애플리케이션에서 새로운 화면으로 이동하거나, 화면 기록(History)을 제어하는 등의 라우팅 작업을 쉽게 처리할 수 있어요.
아래 예제 코드를 통해 다양한 라우팅 기능을 설명할게요.
Bedrock은 React Navigation을 기반으로 동작해요
Bedrock의 화면 이동은 React Navigation 라이브러리를 기반으로 동작해요. 자세한 API는 해당 문서를 참고하세요.
예제 코드
예제 코드는 총 3개의 페이지로 구성되어 있고, 구조는 아래와 같아요.
root
├─── pages
│    ├─── page-a.tsx
│    ├─── page-b.tsx
│    └─── page-c.tsx
└─── src
     └─── ...
page-a.tsx 소스코드
// page-a.tsx
import { useNavigation } from "@granite-js/react-native";
import { StyleSheet, View, Text, Pressable } from "react-native";

export default function PageA() {
  const navigation = useNavigation();

  const handlePress = () => {
    navigation.navigate("/page-b");
  };

  return (
    <View style={[styles.container, { backgroundColor: "#3182f6" }]}>
      <Text style={styles.text}>Page A</Text>
      <Pressable onPress={handlePress}>
        <Text style={styles.buttonLabel}>B 페이지로 이동하기</Text>
      </Pressable>
    </View>
  );
}

const styles = StyleSheet.create({
  container: {
    flex: 1,
    justifyContent: "center",
    alignItems: "center",
    gap: 16,
    padding: 16,
  },
  text: {
    color: "white",
    fontSize: 24,
  },
  buttonLabel: {
    color: "white",
  },
});
page-b.tsx 소스코드
// page-b.tsx
import { useNavigation } from "@granite-js/react-native";
import { StyleSheet, View, Text, Pressable } from "react-native";

export default function PageB() {
  const navigation = useNavigation();

  // 이전 화면으로 돌아가는 함수예요.
  const handlePressBackButton = () => {
    if (navigation.canGoBack()) {
      navigation.goBack();
    } else {
      console.warn("이전 화면으로 이동할 수 없습니다.");
    }
  };

  const handlePressNextButton = () => {
    navigation.navigate("/page-c", {
      message: "안녕!",
      date: new Date().getTime(),
    });
  };

  return (
    <View style={[styles.container, { backgroundColor: "#fe9800" }]}>
      <Text style={styles.text}>Page B</Text>
      <Pressable onPress={handlePressBackButton}>
        <Text style={styles.buttonLabel}>이전으로 이동하기</Text>
      </Pressable>
      <Pressable onPress={handlePressNextButton}>
        <Text style={styles.buttonLabel}>C 페이지로 이동하기</Text>
      </Pressable>
    </View>
  );
}

const styles = StyleSheet.create({
  container: {
    flex: 1,
    justifyContent: "center",
    alignItems: "center",
    gap: 16,
    padding: 16,
  },
  text: {
    color: "white",
    fontSize: 24,
  },
  buttonLabel: {
    color: "white",
  },
});
page-c.tsx 소스코드
// page-c.tsx
import {
  useNavigation,
  useRoute,
  CommonActions,
} from "@granite-js/native/@react-navigation/native";
import { StyleSheet, View, Text, Pressable } from "react-native";

export default function PageC() {
  const navigation = useNavigation();
  const route = useRoute();

  const handlePressHomeButton = () => {
    navigation.dispatch((state) => {
      return CommonActions.reset({
        ...state,
        index: 0,
        routes: state.routes.filter((route) => route.name === "/page-a"),
      });
    });
  };

  return (
    <View style={[styles.container, { backgroundColor: "#f04452" }]}>
      <Text style={styles.text}>{route.params?.message}</Text>
      <Text style={styles.text}>{route.params?.date}</Text>
      <View style={styles.line} />
      <Text style={styles.text}>Page C</Text>
      <Pressable onPress={handlePressHomeButton}>
        <Text style={styles.buttonLabel}>처음으로 이동하기</Text>
      </Pressable>
    </View>
  );
}

const styles = StyleSheet.create({
  container: {
    flex: 1,
    justifyContent: "center",
    alignItems: "center",
    gap: 16,
    padding: 16,
  },
  text: {
    color: "white",
    fontSize: 24,
  },
  buttonLabel: {
    color: "white",
  },
});
페이지 A: 화면 이동하기
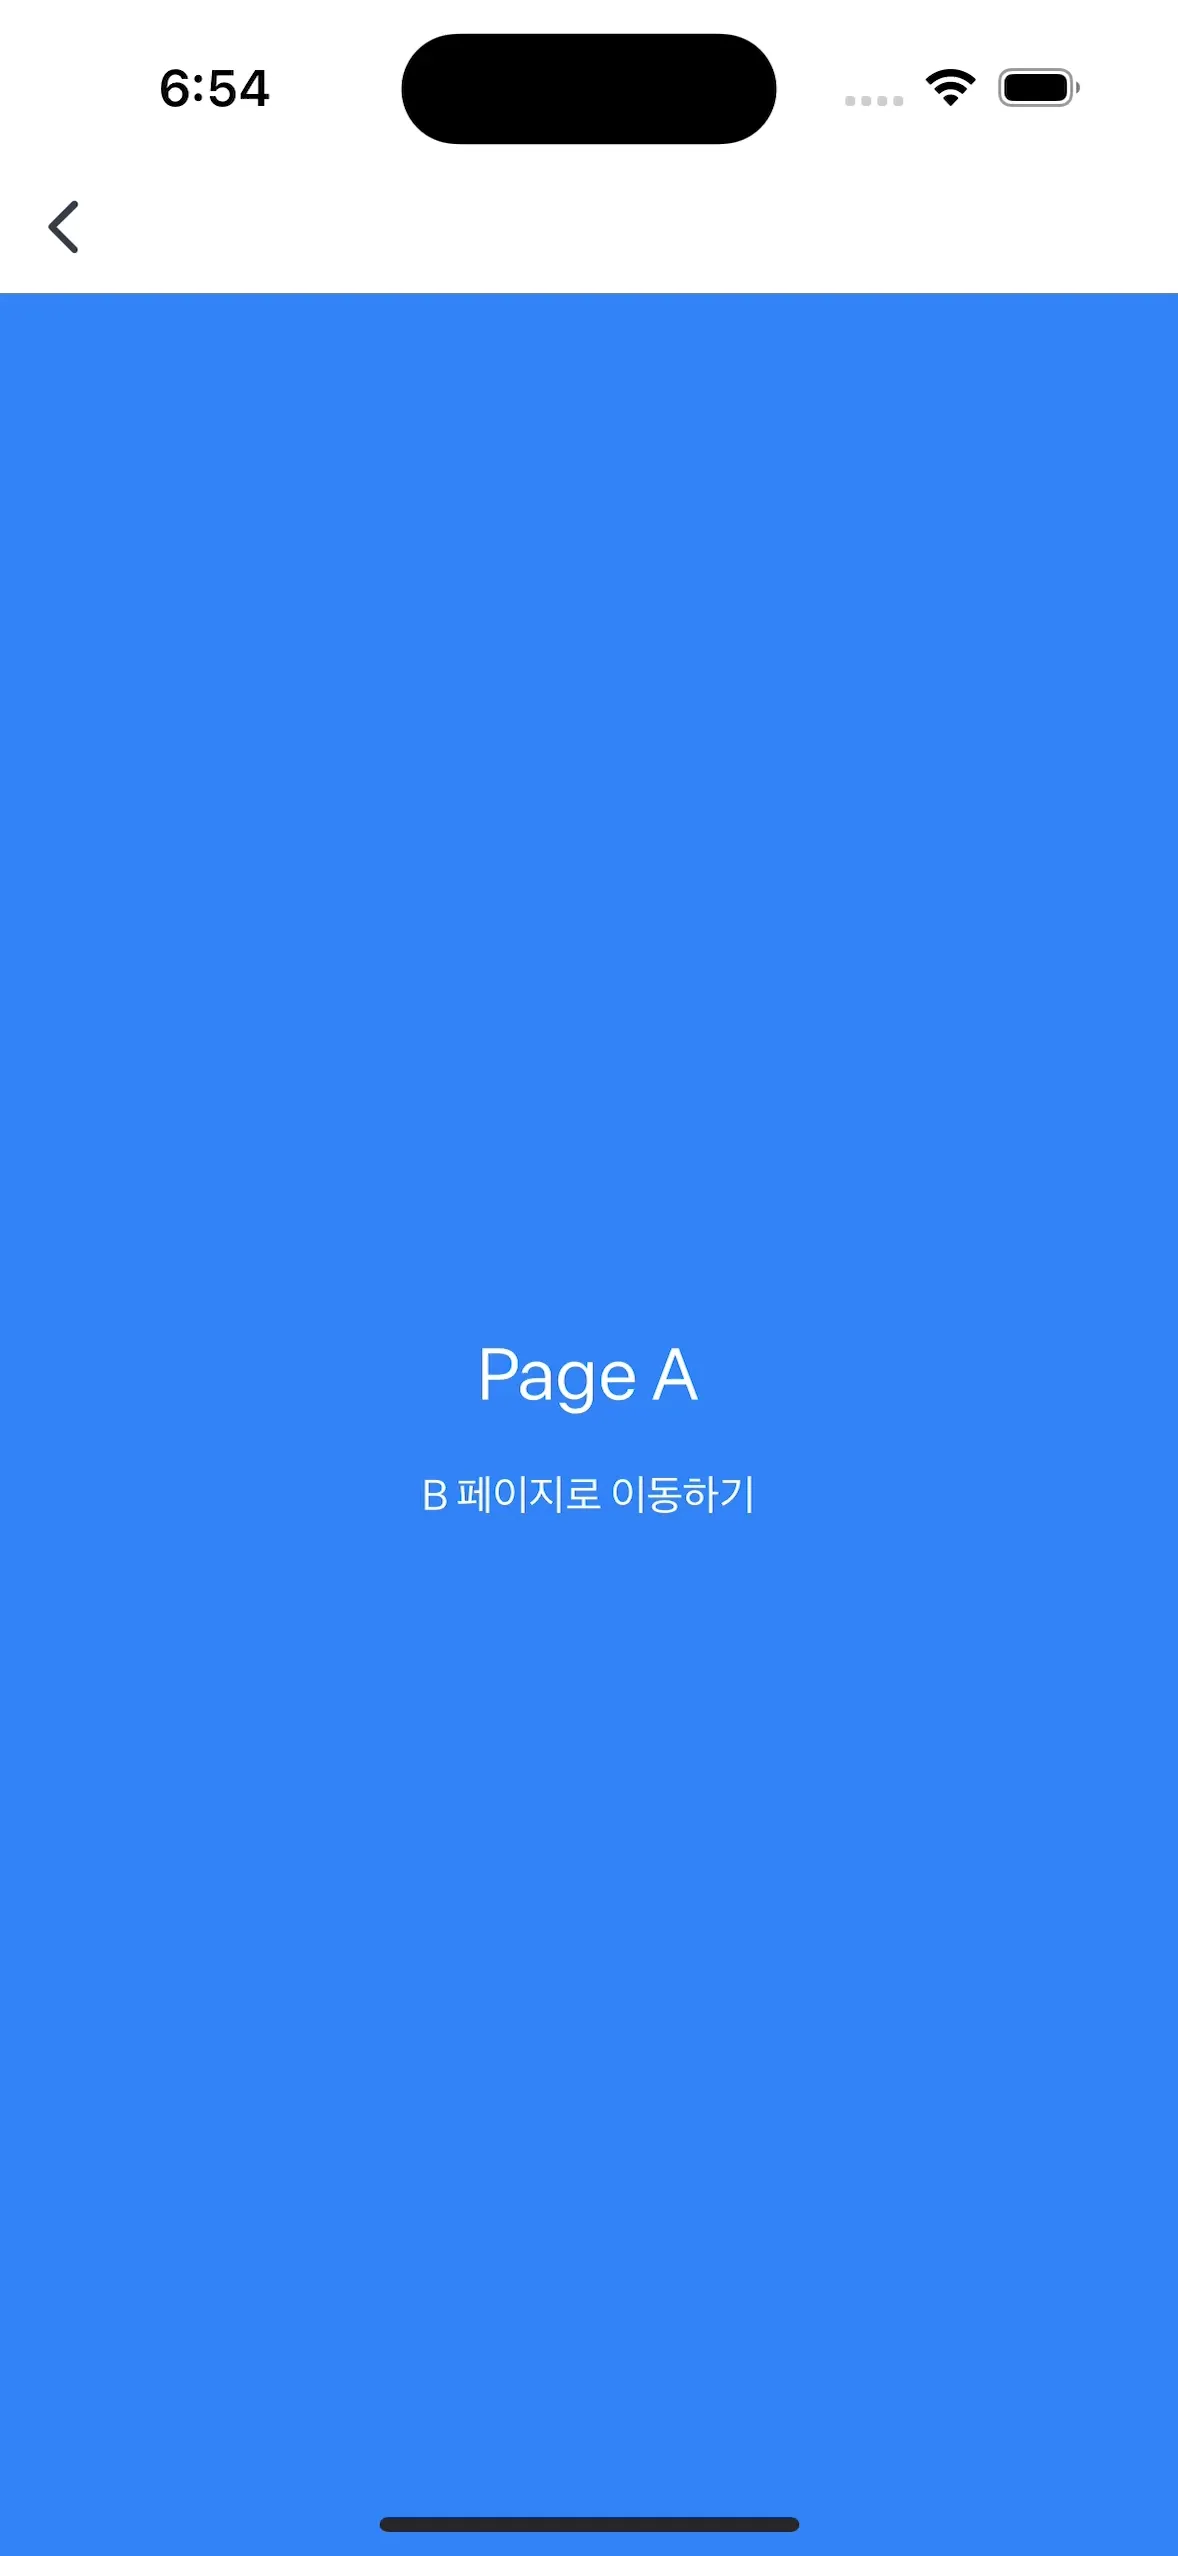
useNavigation 훅을 사용해서 다른 화면으로 이동할 수 있어요. navigate 메서드에 이동할 화면의 경로를 전달하면 됩니다.
// page-a.tsx
import { useNavigation } from "@react-native-bedrock/native/@react-navigation/native"; // [!code focus]
import { StyleSheet, View, Text, Pressable } from "react-native";

export default function PageA() {
  const navigation = useNavigation();

  const handlePress = () => {
    // [!code focus:3]
    navigation.navigate("/page-b");
  };

  return (
    <View style={[styles.container, { backgroundColor: "#3182f6" }]}>
      <Text style={styles.text}>Page A</Text>
      <Pressable onPress={handlePress}>
        <Text style={styles.buttonLabel}>B 페이지로 이동하기</Text>
      </Pressable>
    </View>
  );
}

const styles = StyleSheet.create({
  container: {
    flex: 1,
    justifyContent: "center",
    alignItems: "center",
    gap: 16,
    padding: 16,
  },
  text: {
    color: "white",
    fontSize: 24,
  },
  buttonLabel: {
    color: "white",
  },
});
주요 포인트
useNavigation훅을 사용해navigation객체를 가져와요.navigation.navigate('/page-b')를 호출하면 'B' 페이지로 이동해요.
페이지 B: 이전 화면으로 돌아가기
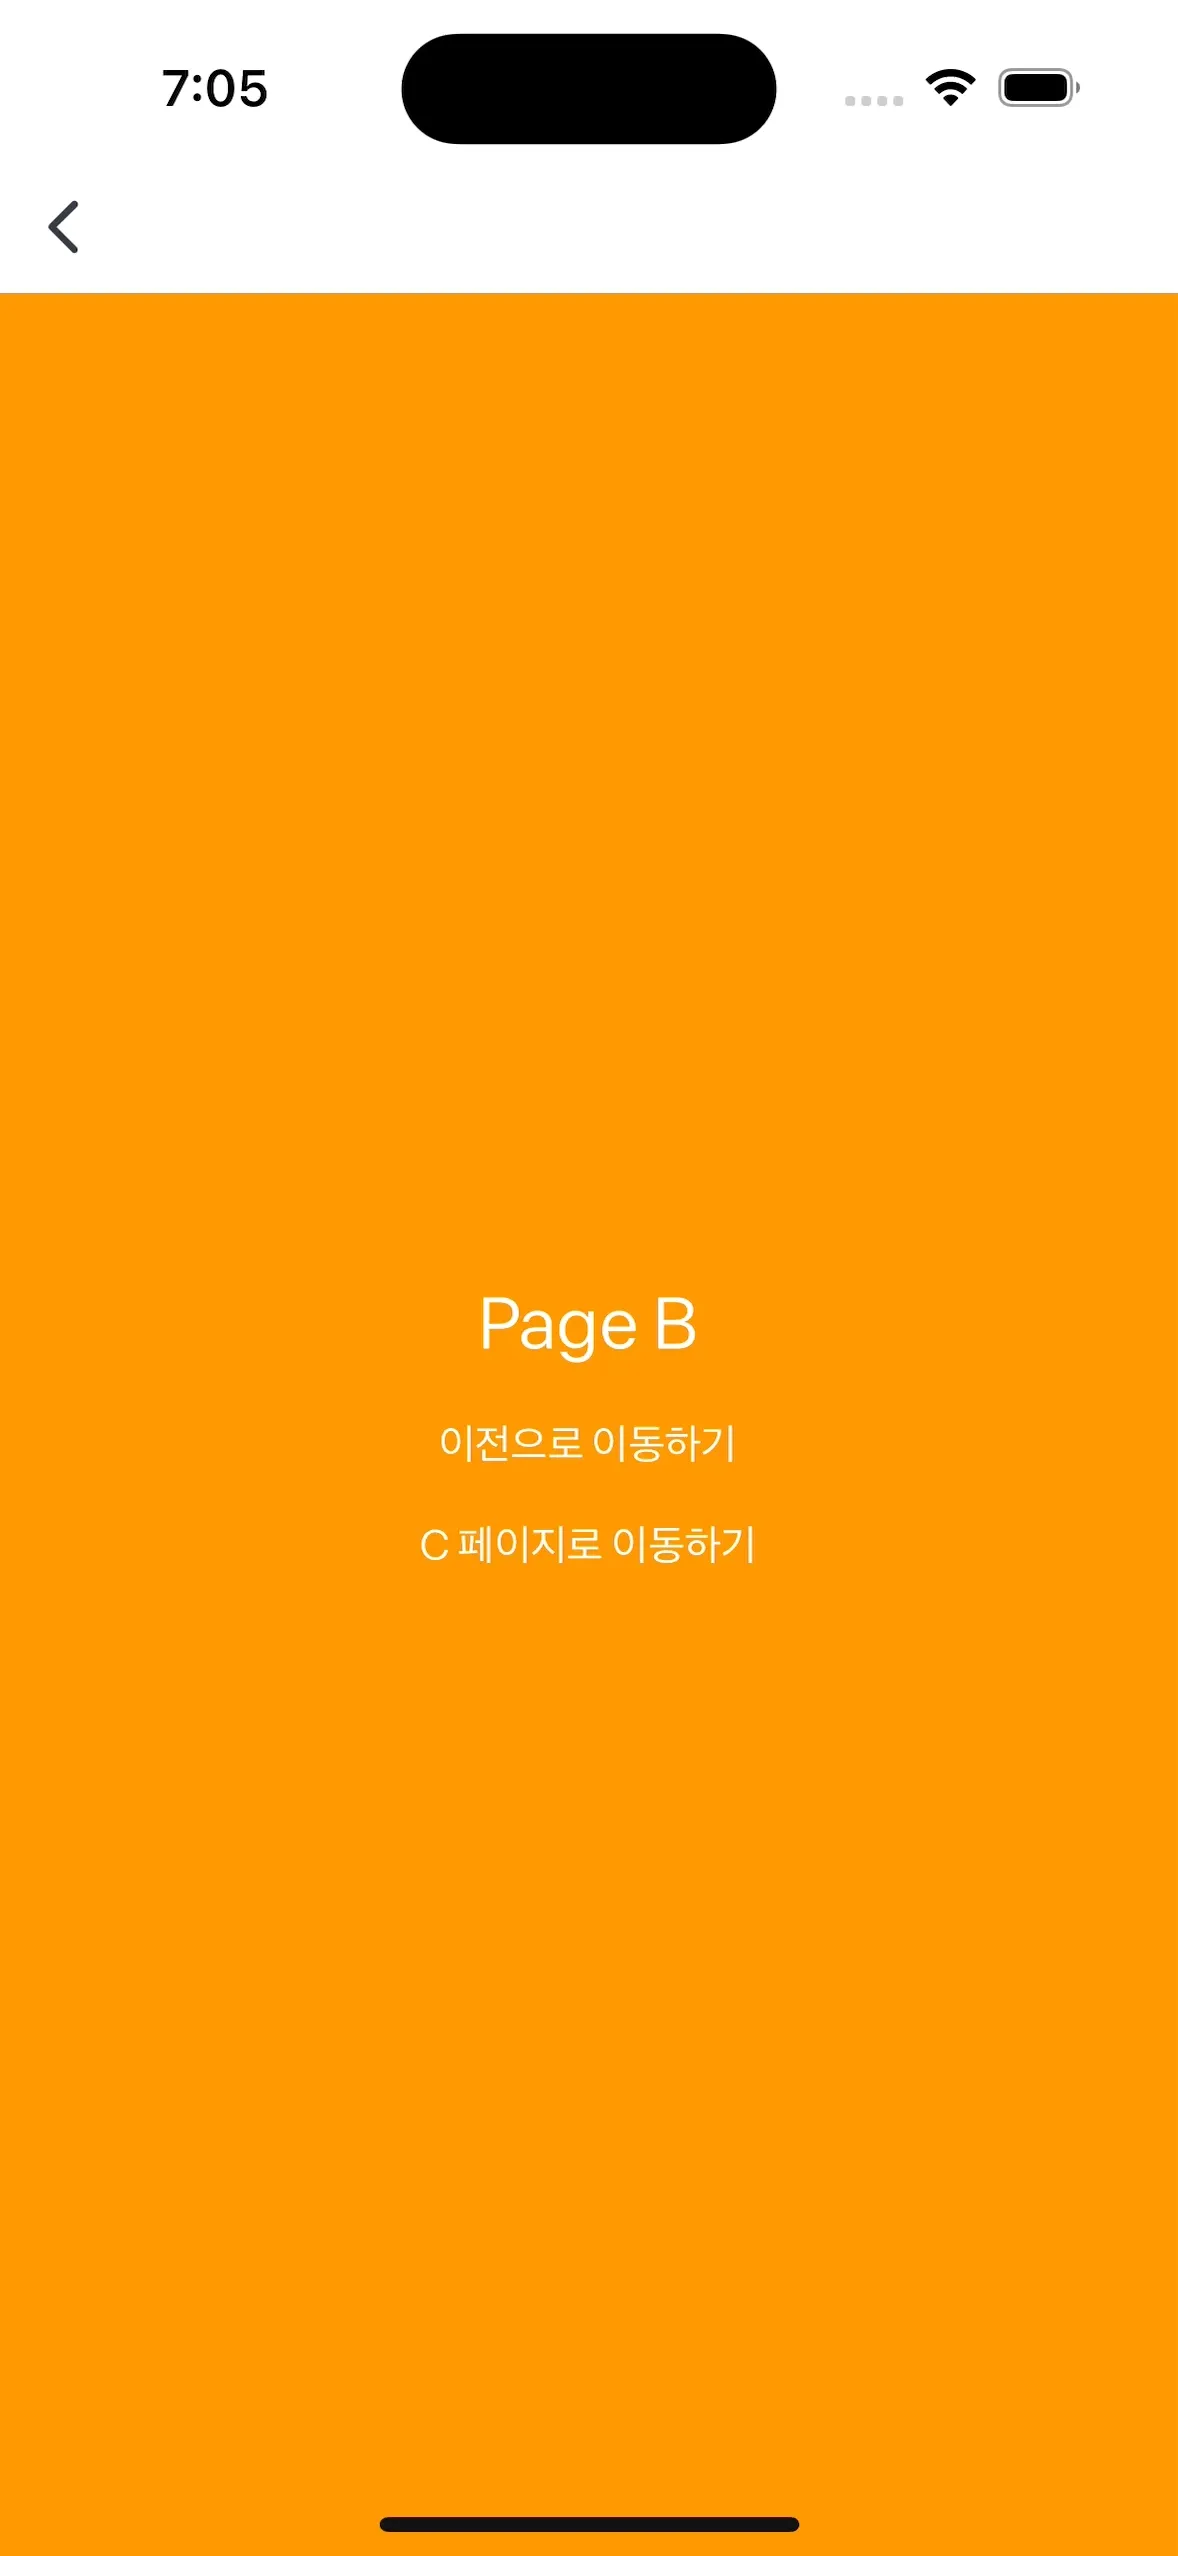
goBack 메서드를 사용하면 이전 화면으로 돌아갈 수 있어요. 하지만 이전 화면 기록이 없는 경우에는 에러가 발생할 수 있으니, canGoBack으로 먼저 확인해야 해요.
// page-b.tsx
import { useNavigation } from "@react-native-bedrock/native/@react-navigation/native"; // [!code focus]
import { StyleSheet, View, Text, Pressable } from "react-native";

export default function PageB() {
  const navigation = useNavigation(); // [!code focus]

  // 이전 화면으로 돌아가는 함수예요.  // [!code focus:8]
  const handlePressBackButton = () => {
    if (navigation.canGoBack()) {
      navigation.goBack();
    } else {
      console.warn("이전 화면으로 이동할 수 없습니다.");
    }
  };

  const handlePressNextButton = () => {
    navigation.navigate("/page-c", {
      message: "안녕!",
      date: new Date().getTime(),
    });
  };

  return (
    <View style={[styles.container, { backgroundColor: "#fe9800" }]}>
      <Text style={styles.text}>Page B</Text>
      <Pressable onPress={handlePressBackButton}>
        <Text style={styles.buttonLabel}>이전으로 이동하기</Text>
      </Pressable>
      <Pressable onPress={handlePressNextButton}>
        <Text style={styles.buttonLabel}>C 페이지로 이동하기</Text>
      </Pressable>
    </View>
  );
}

const styles = StyleSheet.create({
  container: {
    flex: 1,
    justifyContent: "center",
    alignItems: "center",
    gap: 16,
    padding: 16,
  },
  text: {
    color: "white",
    fontSize: 24,
  },
  buttonLabel: {
    color: "white",
  },
});
주요 포인트
canGoBack()으로 이전 화면이 있는지 확인하고, 있으면goBack()을 호출해요.navigate('/page-c', { message: '안녕!', date: new Date().getTime() })로 데이터를 전달하면서 'C' 페이지로 이동해요.
페이지 C: 전달받은 데이터 사용하기
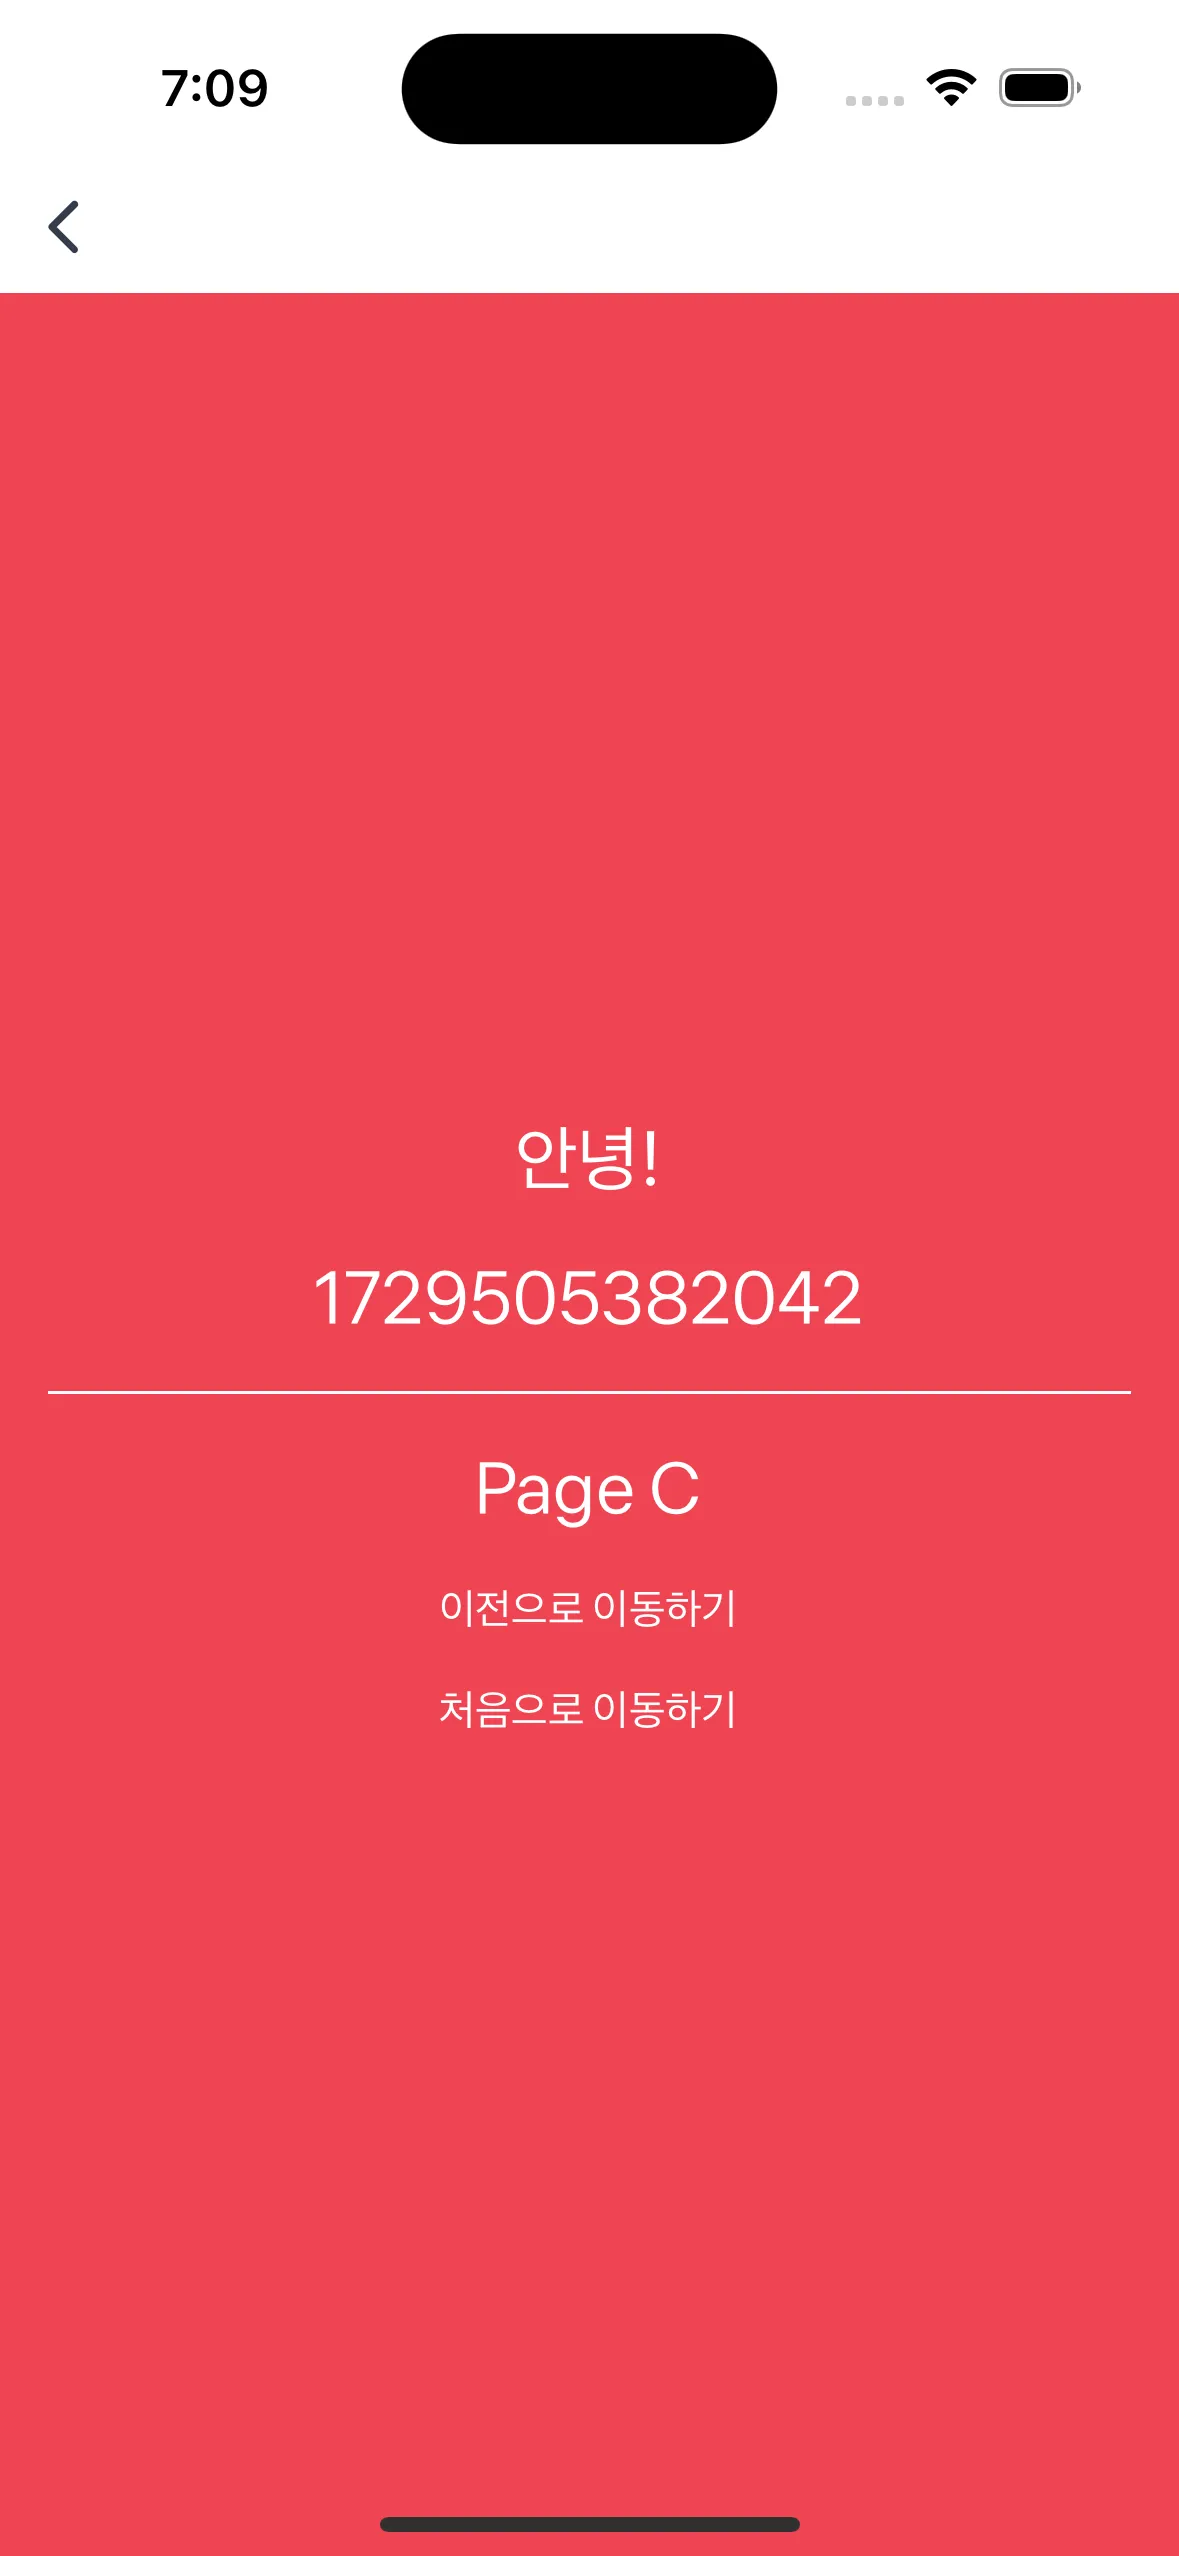
useRoute 훅을 사용하면 다른 화면에서 전달된 데이터를 가져올 수 있어요. 전달된 데이터는 route.params를 통해 접근할 수 있어요.
import {
  useNavigation,
  useRoute,
  CommonActions,
} from "@granite-js/native/@react-navigation/native"; // [!code focus]
import { StyleSheet, View, Text, Pressable } from "react-native";

export default function PageC() {
  const navigation = useNavigation();
  const route = useRoute(); // [!code focus]

  const handlePressHomeButton = () => {
    navigation.dispatch((state) => {
      return CommonActions.reset({
        ...state,
        index: 0,
        routes: state.routes.filter((route) => route.name === "/page-a"),
      });
    });
  };

  return (
    <View style={[styles.container, { backgroundColor: "#f04452" }]}>
      <Text style={styles.text}>{route.params?.message}</Text> // [!code focus]
      <Text style={styles.text}>{route.params?.date}</Text> // [!code focus] // [!code
      highlight]
      <View style={styles.line} />
      <Text style={styles.text}>Page C</Text>
      <Pressable onPress={handlePressHomeButton}>
        <Text style={styles.buttonLabel}>처음으로 이동하기</Text>
      </Pressable>
    </View>
  );
}

const styles = StyleSheet.create({
  container: {
    flex: 1,
    justifyContent: "center",
    alignItems: "center",
    gap: 16,
    padding: 16,
  },
  text: {
    color: "white",
    fontSize: 24,
  },
  buttonLabel: {
    color: "white",
  },
});
주요 포인트
useRoute훅을 사용해 전달받은 데이터에 접근할 수 있어요.
라우팅 상태 초기화하기

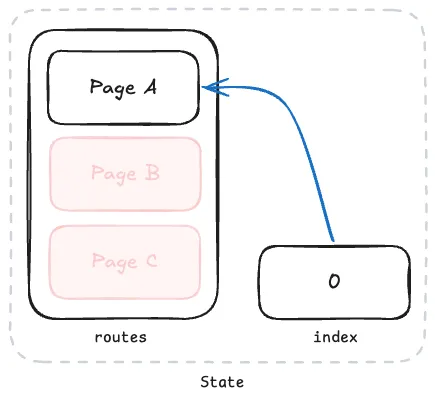
페이지 A → 페이지 B → 페이지 C 순서로 이동한 직후의 상태는 아래와 그림과 같이 같이 나타낼 수 있어요.
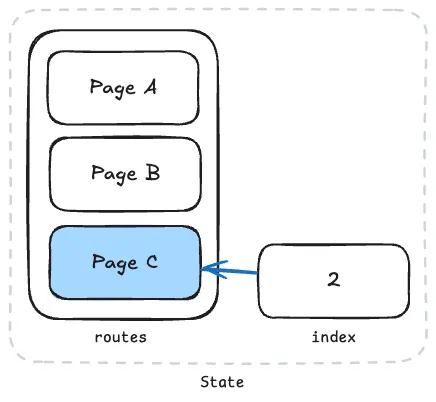
페이지 A, 페이지 B, 페이지 C가 순서대로 routes 기록에 남아 있고, index 값은 마지막으로 이동한 페이지 C의 위치인 2를 가리켜요.
reset을 사용하면 화면 이동 기록을 초기화할 수 있어요. 예를 들어, '페이지 A → B → C'로 이동한 후에 '페이지 A'로 돌아가면서 B와 C 기록을 삭제하고 싶다면, CommonActions.reset을 사용해요.
navigation.dispatch(
  CommonActions.reset({
    index: 0,
    routes: [{ name: "/page-a" }],
  })
);
주요 포인트
CommonActions.reset으로 특정 화면만 기록에 남기고 나머지 화면 기록을 삭제할 수 있어요.
타입 정의하기
프로젝트에 타입스크립트를 적용해서 화면 경로와 파라미터를 타입으로 정의하면, 더 안전하게 코드를 작성할 수 있어요.
// src/navigation.d.ts
import type { RouteProp } from "@react-native-bedrock/native/@react-navigation/native";
import type { NativeStackNavigationProp } from "@react-native-bedrock/native/@react-navigation/native-stack";

// 각 화면 경로와 해당 화면에서 받을 파라미터 타입을 정의해요.
type ParamList = {
  "/page-a": undefined; // '페이지 A'는 파라미터가 없어요.
  "/page-b": undefined; // '페이지 B'는 파라미터가 없어요.
  "/page-c": { message: string; date: number }; // '페이지 C'가 받는 파라미터의 타입
};

declare global {
  namespace ReactNavigation {
    interface RootParamList extends ParamList {}
  }
}

declare module "@react-native-bedrock/native/@react-navigation/native-stack" {
  export function useNavigation<T = NativeStackNavigationProp<ParamList>>(): T;
  export function useRoute<T = RouteProp<ParamList>>(): T;
}
주요 포인트
- 각 화면에서 받을 파라미터의 타입을 정의해두면,
navigate와route사용 시 타입 검사를 받을 수 있어 더 안전하게 코드를 작성할 수 있어요.
이렇게 React Navigation을 사용하면 화면 간 이동을 쉽게 처리할 수 있고, 데이터를 전달하거나 기록을 조작하는 기능을 통해 다양한 UX를 구현할 수 있어요. 또한 타입스크립트와 함께 사용하면 안전하고 견고한 코드를 작성할 수 있답니다.